
How To: Easy Reversible, Adjustable Apron
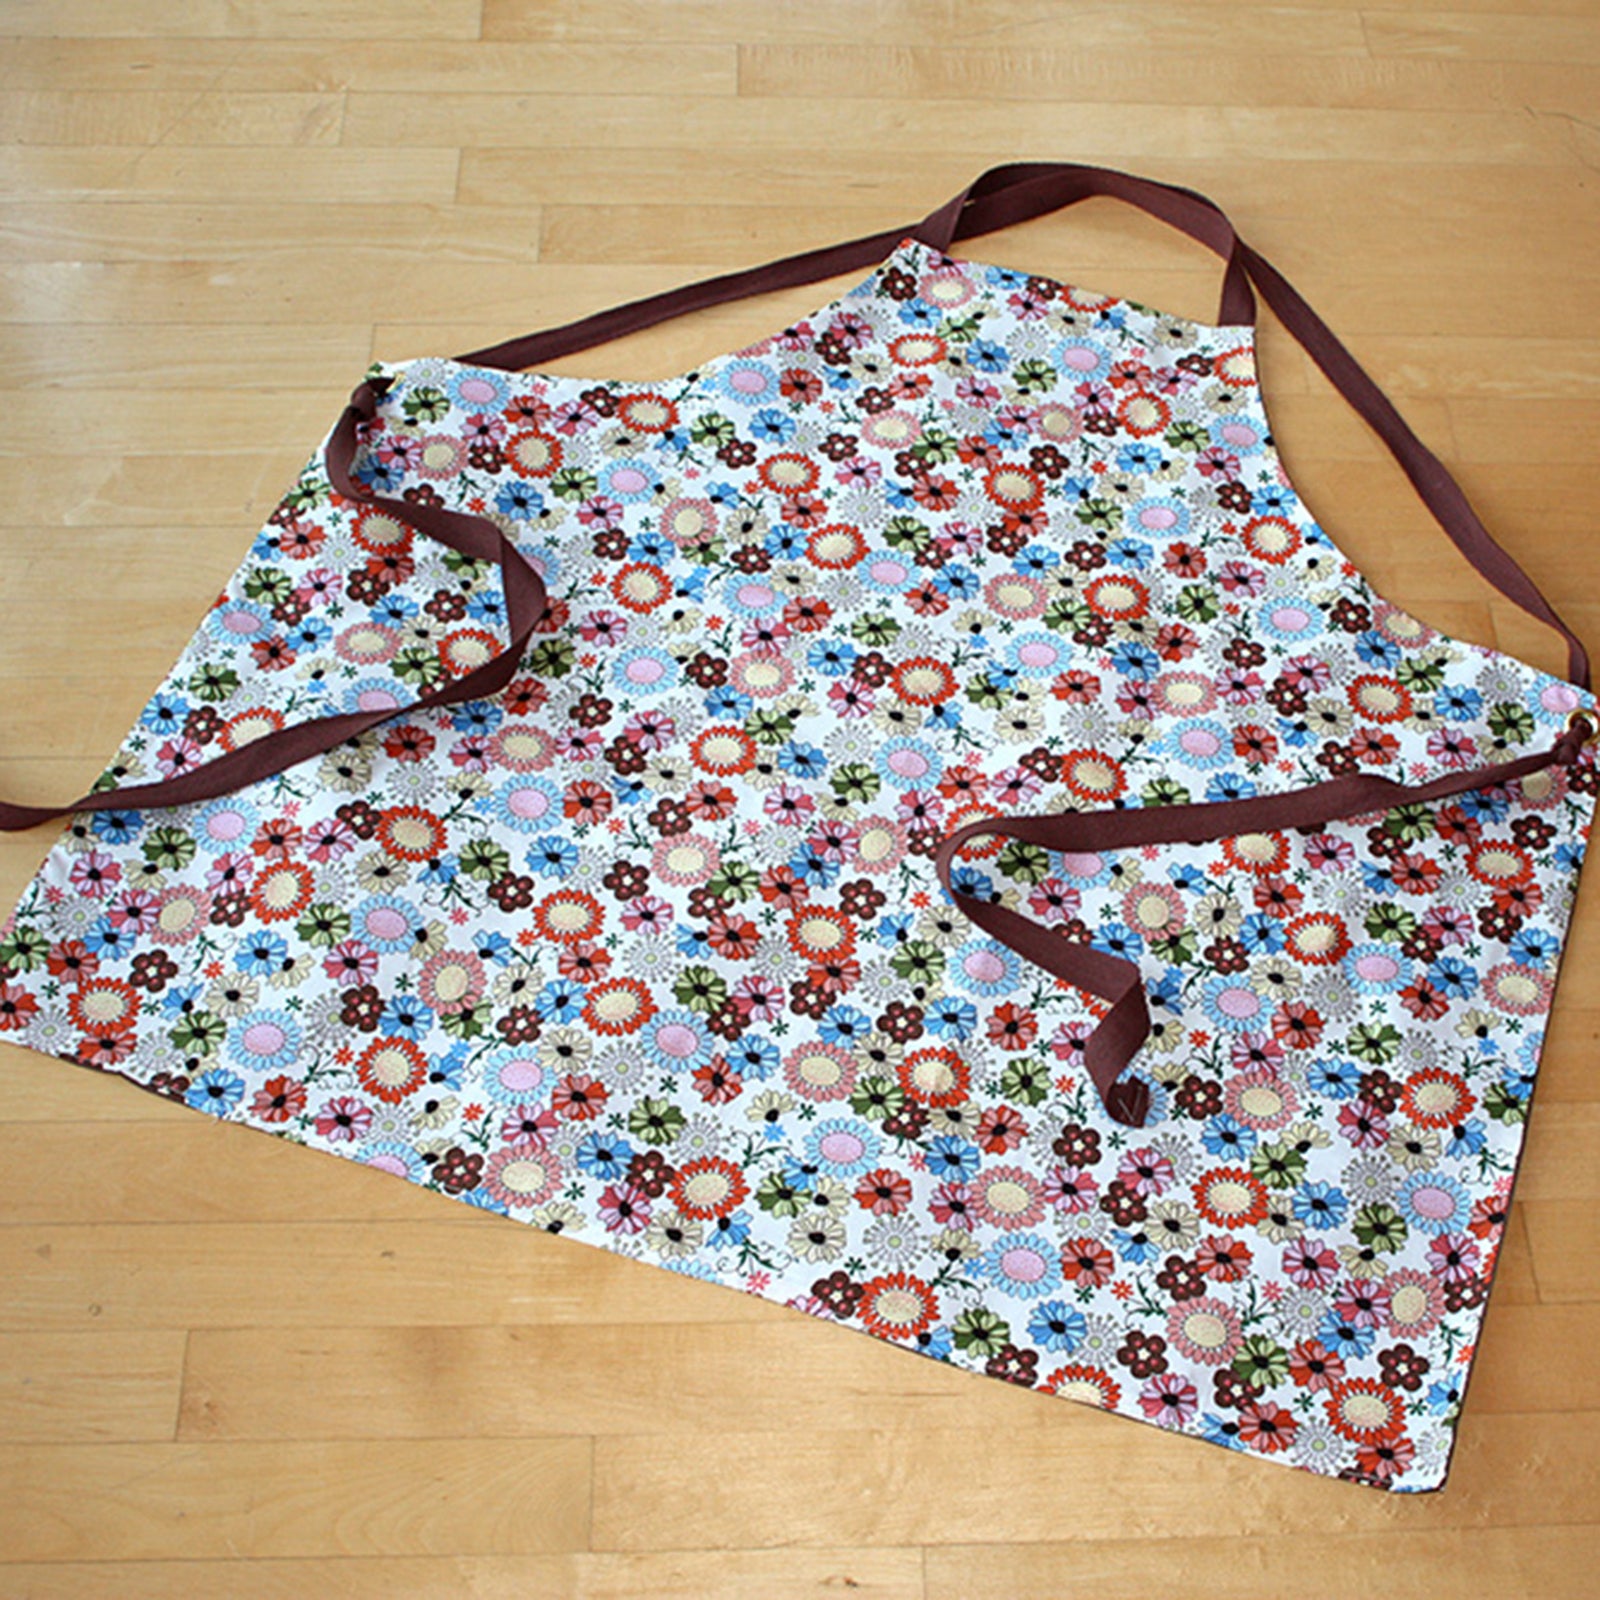
Here is a tutorial for an easy sewing project. I like this apron because, as a short person, I am often frustrated by how aprons fit me. This one adjusts easily and fits any size person. It's also reversible, which is nice if company's coming over and you haven't had time to do laundry.
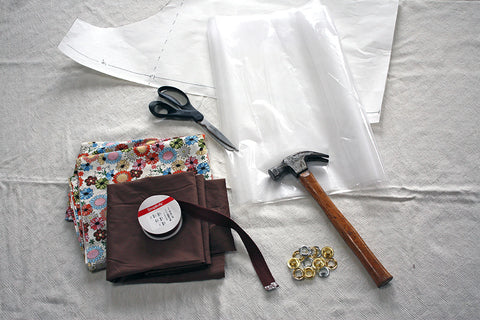
You need:
-
one yard each of two different fabrics--light cotton broadcloth, quilting fabric, or heavier twill or canvass all work
-
cotton twill tape--1" width is good, 9' (3 yards)
-
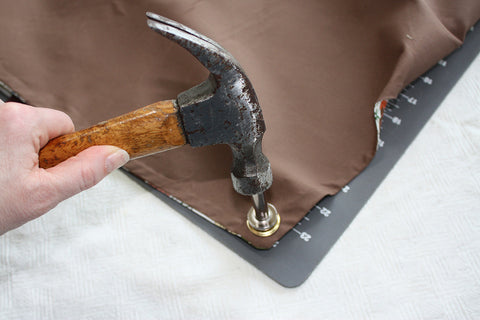
large metal grommets and the setting tools they come with
-
hammer to set the grommets
-
fusible interfacing--this is optional, depending on the weight of fabric you are using
-
large sheet of paper to make your pattern
-
scissors, thread, etc.
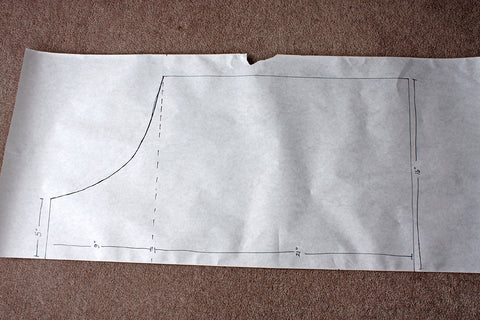
First you need to make your pattern. The pattern will be only half as wide as the finished apron. I used the white paper from my kids' craft roll, but you could also use the back side of wrapping paper, etc. The measurements are as follows:
neck--5"
length from neck to bottom--30"
width from edge of paper to outer edge of pattern--16"
distance from the top of the apron to where you need to start the curve for the arm pit--9"
distance from arm pit corner to bottom of apron--21"
To make the arm pit curve, you need to just eyeball it. I recommend using a pencil at first so that you can adjust.
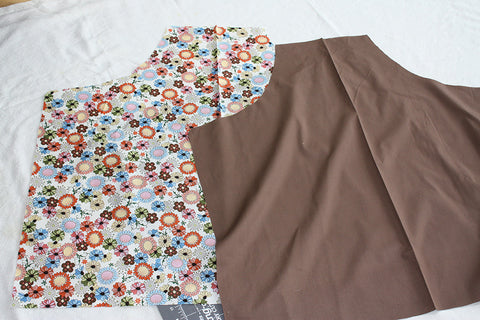
Once you've made the paper pattern and cut it out, iron both pieces of fabric so that they are nice and smooth and have a clean folded edge. Place the two pieces of fabric on top of each other, with the folded edges perfectly aligned. Place the long, straight edge of the pattern on the folded fabric edge. Smooth out any folds or ripples in the fabric and pin all around the edge of the paper pattern.
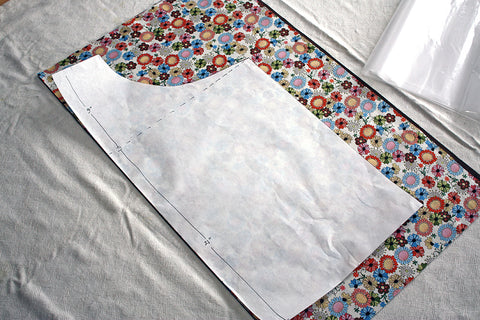

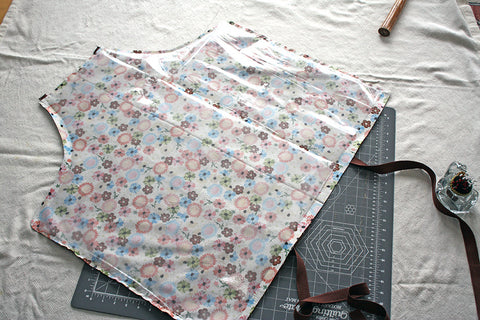
Cut along the three edges of the paper pattern that will form the outside edge of the apron. Remove the pins and unfold both pieces of fabric. It should look like this.
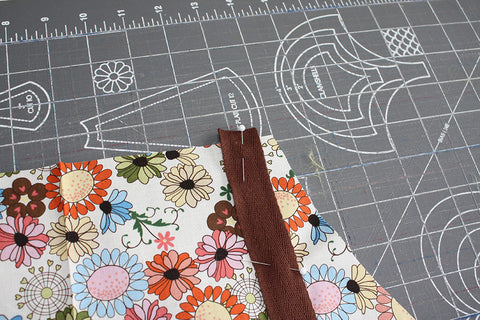
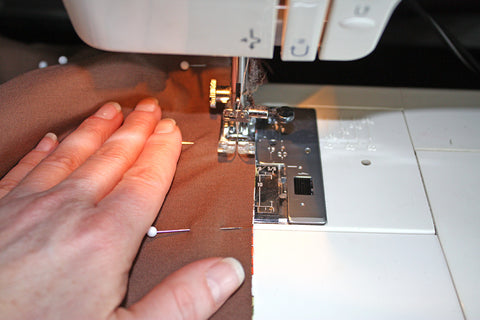
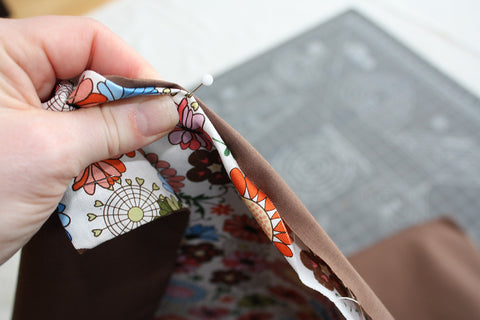
Next, cut your cotton twill tape into two equal sized pieces and pin each one at the top of the apron, 1/2" in from the edge. Make sure you are pinning it to the finished side of the fabric. I also add a couple of pins further down the twill tape, just to hold it in place while I'm sewing. It's always a bummer when you sew pieces together, then find out that a renegade bit has gotten stuck in the stitches.
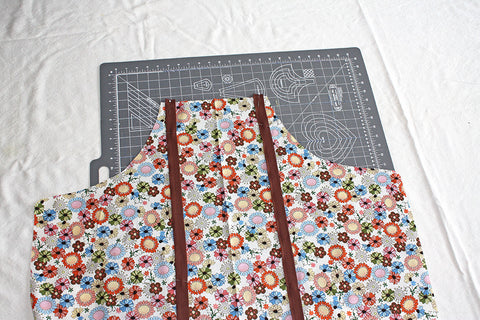
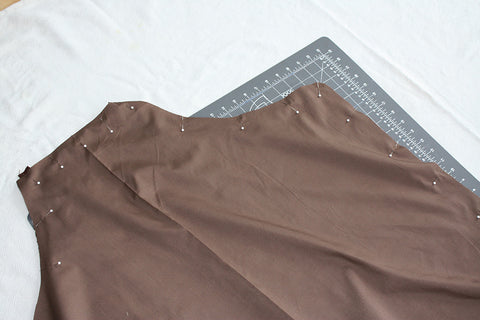
Place the other piece of fabric (finished side down) on top of the first, and pin them together all around the edge. Remember that you will be turning this whole thing inside out (or outside in, actually). Then sew the two sides and the neck edge (with a 14" seam allowance), leaving the bottom open.
This next bit is optional and really only is necessary if you are using a lightweight fabric (like quilting cotton). I used fusible interfacing, which basically glues the two pieces of fabric together, keeps them from slipping around, and adds weight to the whole apron. Apply the interfacing (bumpy, adhesive side down) to one side of your apron. This is still being applied to the unfinished side of the fabric. It doesn't matter if your interfacing is all in one piece, since it doesn't come in large widths. Iron on the interfacing, following the manufacturers instructions. I left about 12"-1" margin around the interfacing and did not have it go all the way to the edge of the fabric.
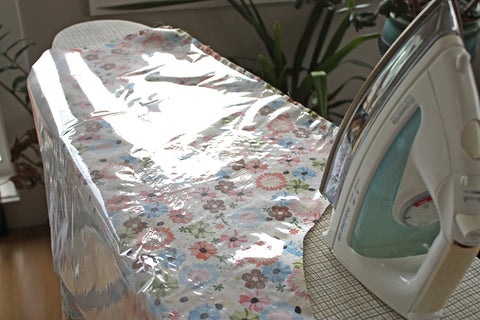
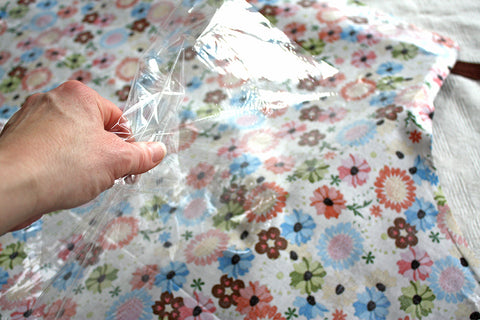
Once it has cooled, peel away the plastic. This leaves one of your fabric pieces covered with adhesive. This is the only tricky part!! When you turn the apron right-side out the fabric that has interfacing applied to it will tend to stick to itself. It is best not to have small children present during this part of your project, as there may be much clenching of fists and gnashing of teeth, accompanied by a river of expletives. Once it has been successfully turned right-side out, iron the apron. Remember...you can skip the interfacing part altogether, if you've used heavier weight fabric or don't care about it all being fused.
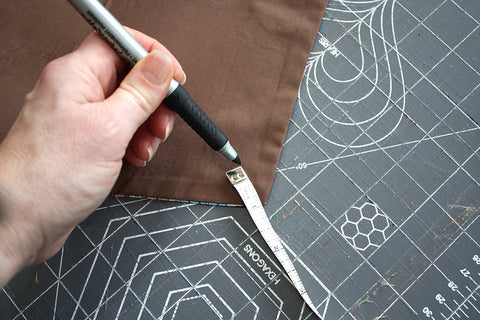
Next, finish the bottom edge by turning in both pieces of fabric, about 1/2", pinning the whole edge, then running a straight stitch along it with a 1/4" seam allowance.
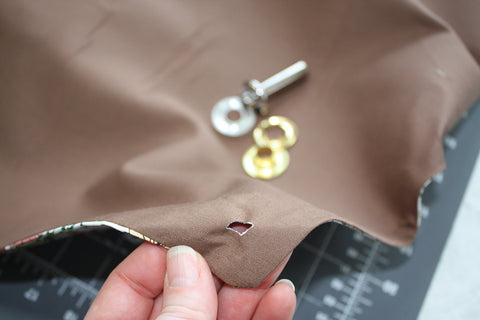
The last step is to mark and cut holes for the grommets. I measured in about 1" from the arm pit corner of the apron, then cut my hole by folding over the fabric into quarters. You could use any method you want to make your hole though.
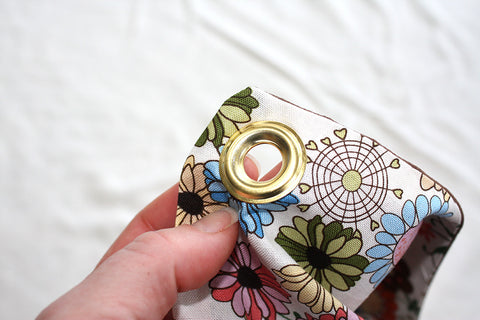
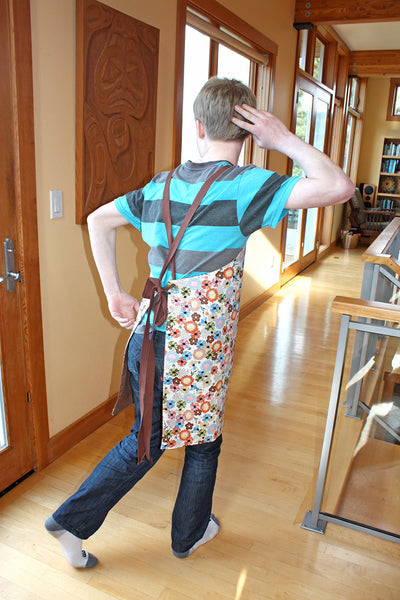
Finally, finish the ends of the straps and thread them through the grommet holes so that they criss-cross over the back of the apron-wearer. I added knots to the twill tape that prevent the straps from coming all the way out of the holes, but that's not essential.
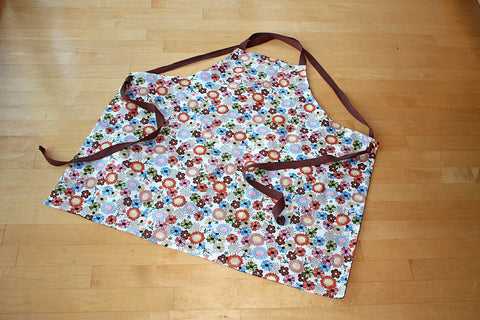
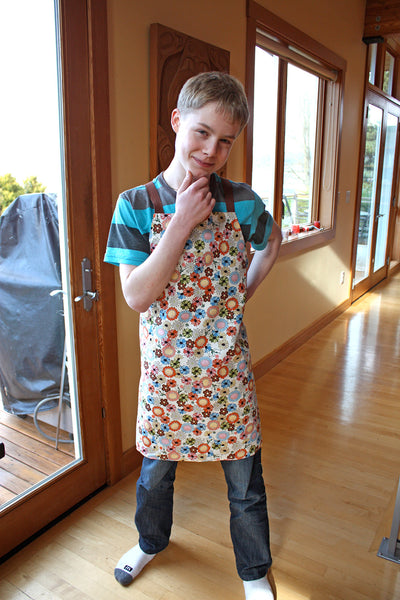
Here is my son, the thespian, modeling the finished product. You can see how the straps cross over the back. If you were making the apron for a very tall person, you could add a few inches to the length of the pattern. My son is a few inches taller than me and this apron still fits him great.
It's a great and truly easy sewing project. Enjoy!
What brand interfacing did you use
Leave a comment