DIY Guide: Make Your Own Low-Waste Self-Watering Seed Starter Pots
Looking for a fun and eco-friendly project to kickstart your gardening journey? We've got you covered! In this step-by-step guide, we'll show you how to create your own self-watering seed starter pots using simple materials that you probably already have at home. Whether you're a seasoned DIY enthusiast or just starting out, this project is perfect for creative minds who appreciate low-waste solutions. Let's get started!
Step 1: Gather Your Materials
To create these self-watering seed starter pots, you'll need a few basic items. Don't worry, they're easy to find and budget-friendly:
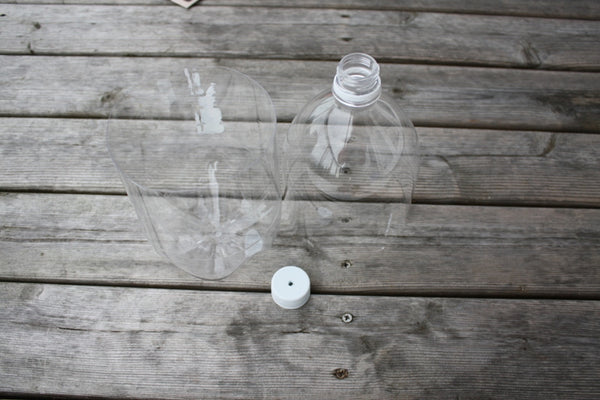
- Empty 2-liter plastic bottles
- Potting soil
- Seeds of your choice
- Thick string or yarn (preferably cotton or polyester)
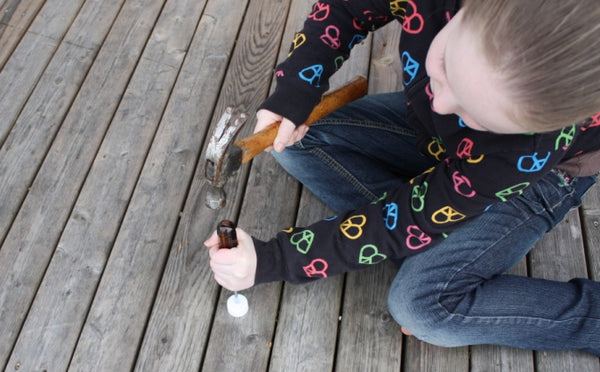
- A Phillips screwdriver
- A hammer
- A sharp blade for cutting the bottle

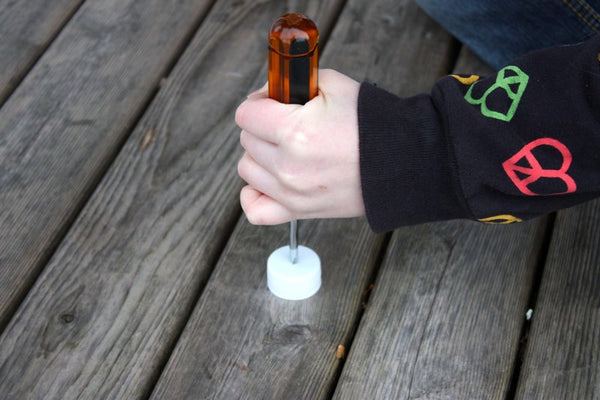
Step 2: Prepare the Bottle Caps
Using a Phillips screwdriver and a hammer, punch a hole in the center of each bottle cap. This will create a way for water to flow from the base of the pot to the soil above.
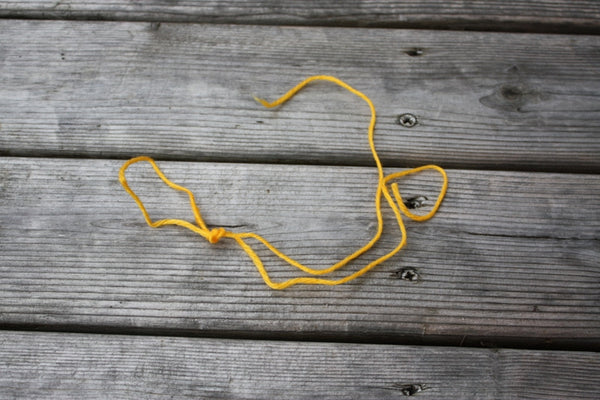
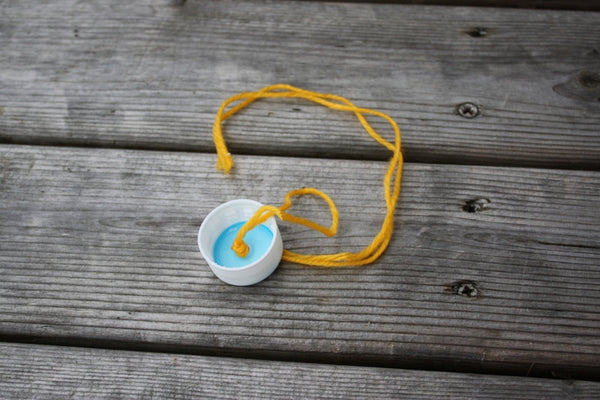
Step 3: Create the Wick
Cut a length of yarn or string, around 1 to 1.5 feet long. Double it over and tie a loop on one end. Thread the yarn or string through the hole in the bottle cap, making sure the knot is on the inside of the cap. This looped yarn will act as a wick, drawing water up from the base and into the soil as needed.
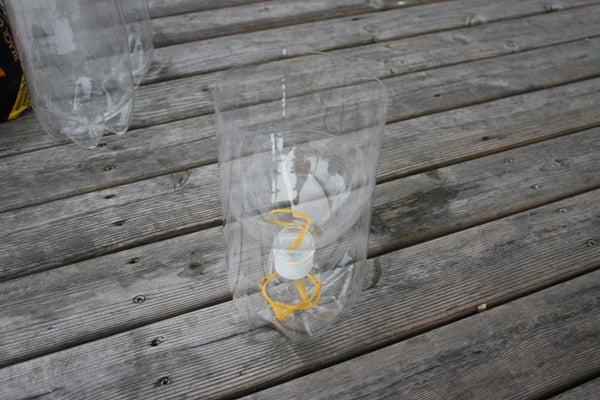
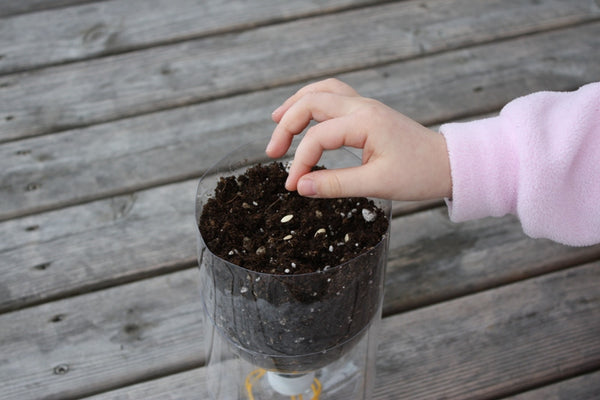
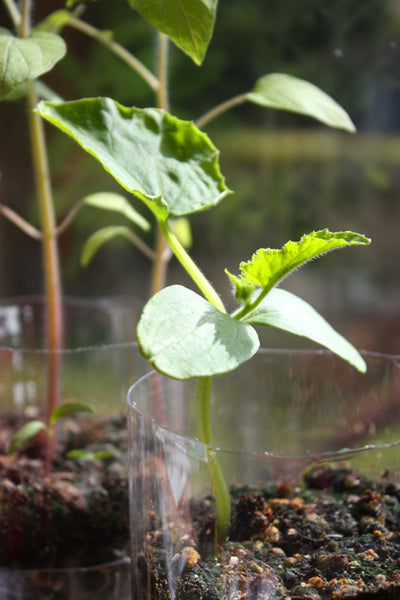
Step 4: Assemble the Self-Watering Pot
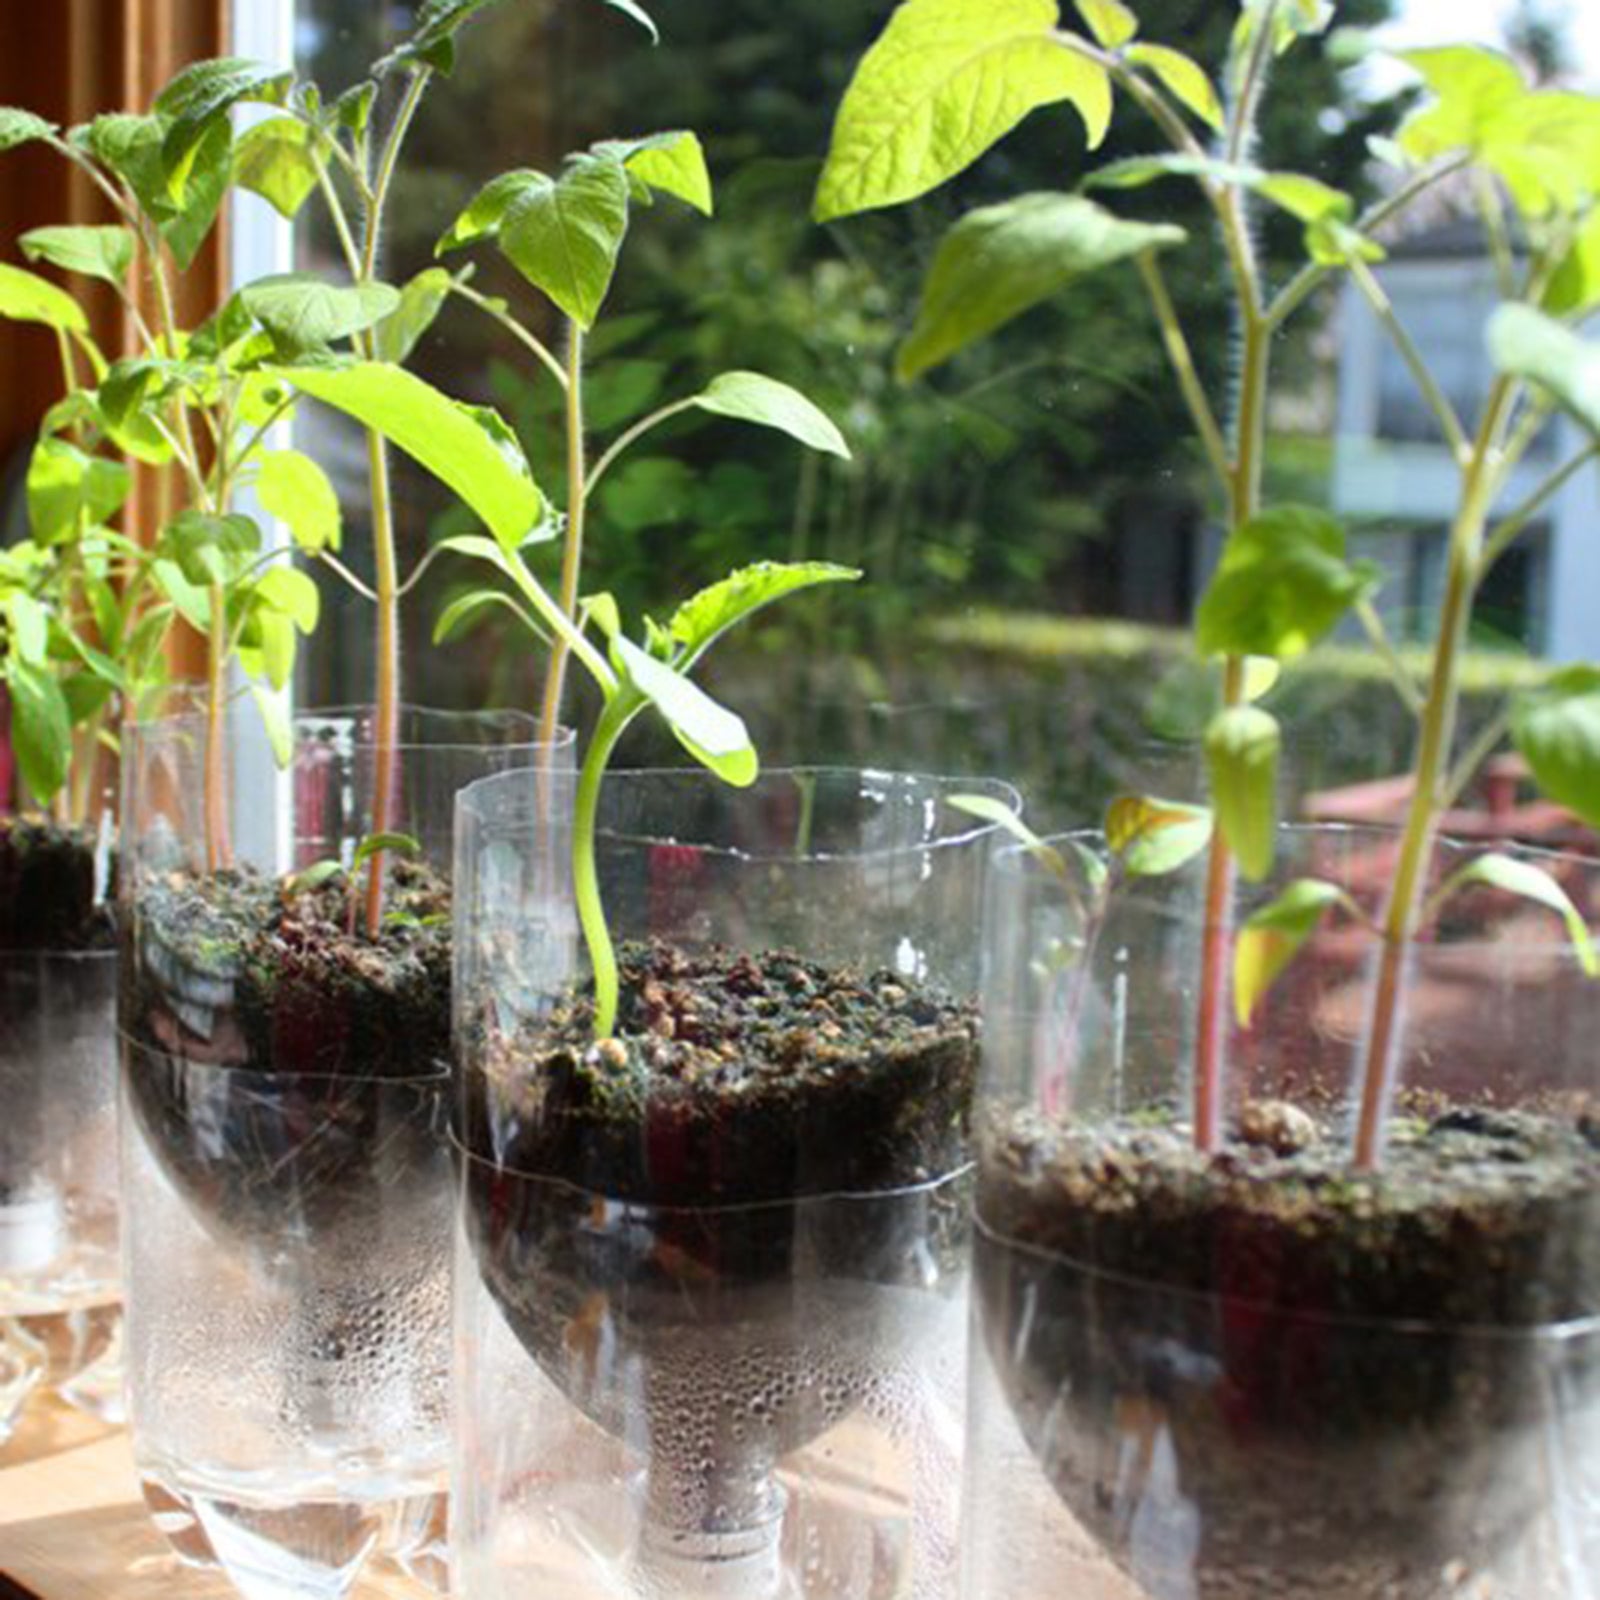
Put the cap back on the bottle top and nest the top of the bottle in the base. As your plants grow and use up the water, you can simply lift off the top part of the bottle to add more water to the base. This self-watering system ensures that the soil moisture is perfectly regulated, and there's no guesswork involved.
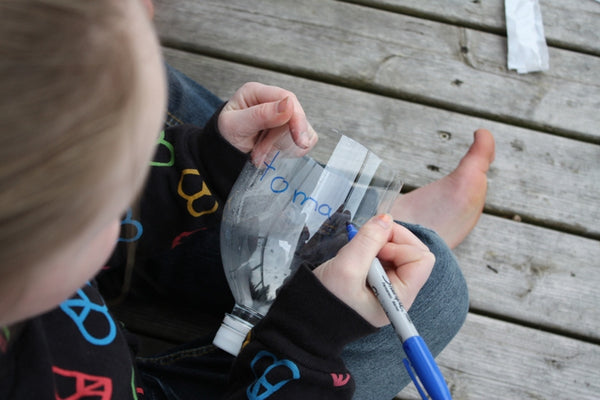
Step 5: Label and Water the Pots
Label your self-watering pots so you can keep track of what you planted. To ensure proper functionality, water the soil from the top the first time, making sure it is uniformly wet and the string is soaked as well. This step is crucial to maintain the surface tension needed for capillary action later on.
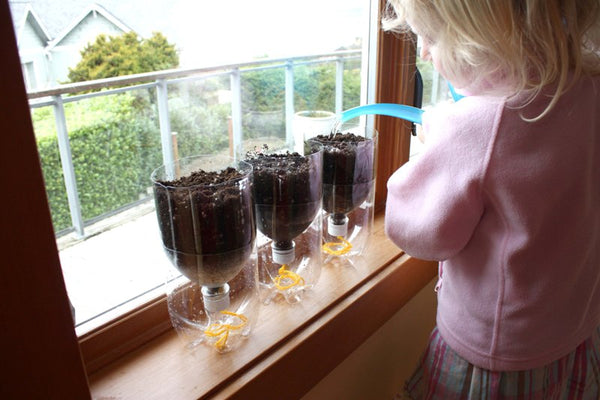
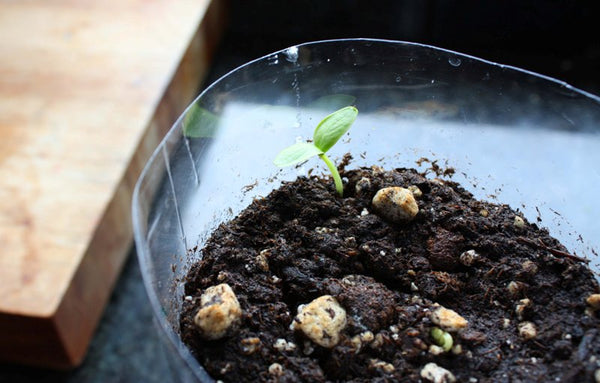
Step 6: Watch Your Plants Thrive
Place your self-watering seed starter pots in a sunny spot and watch them grow. The self-watering design ensures that your plants receive the right moisture levels without overwatering or underwatering. It's an efficient and effective way to nurture your seedlings.
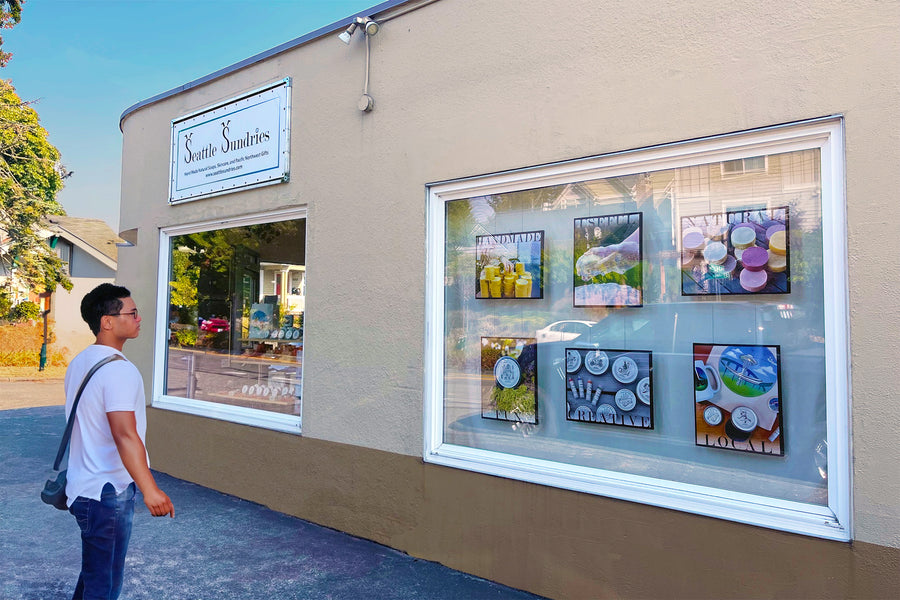
At Seattle Sundries, we're passionate about supporting sustainable and creative projects like this one. Our handcrafted products, made with high-quality natural ingredients, align with the values of authenticity and eco-consciousness. Check out our range of soaps, lotions, and lip balms that complement your mindful lifestyle.
A note to all readers:
I've had lots of great comments and questions about this post, many of which I'm not able to answer myself because I just don't have the broad range of knowledge about plants that is necessary. If you do have that knowledge, please feel free to jump on board the comments string with your input. It would be greatly appreciated!
Also, we have moved this post over (Jan, 2014) from our previous blog platform, and were unable to bring all of the excellent comments with it, so we are including a few here...
- Anonymous said...Place a block of wood under the cap when punching the hole or you will end up with a splintered deck/floor.
- Anonymous said...I use 1 quart Gatorade bottles and do the same thing. If you threw out the lid it's no big thing, use several cotton balls or a bunched up piece of paper towel, or cotton fabric, or even a piece of sponge to act as an absorber and clog the hole.
- Anne said...I also had been thinking about using an unbleached coffee filter inside the bottle, to hold the soil. This would help the moisture to wick evenly and it would make it very easy to remove the plants if you plan to transplant them into the garden at a later date. I haven't tried it yet though.
- @Jenny...The first time I water them from the top so that the soil gets a good dose of wetness. After that, I lift the top part (with the plant in it) up and pour an inch or two of water into the bottom. As long as the soil didn't completely dry back out, the water will be sucked up into the pot from below. If the soil dries out too much, it breaks the surface tension bond of the water and inhibits capillary action (which is why the whole thing works in the first place), so you would need to water from the top again. Does that make sense? Sorry for the wordy explanation.
- @Anonymous...I only add water when I see that it's close to empty in the bottom basin (every four to seven days, depending on the size of the plant). I try to never let it dry out completely. I bet this method would work well for you, even if you only water once a week. You could cut the bottle so that the lower portion was actually larger (say 70% instead of 50%) and would hold more water wile you're away.
- Anonymous said...For those who have discarded the lids, you can always use a small square of old screen to block the hole, yet water through.
- Unknown said...Don't use a screwdriver. If you want to punch it, then buy a awl or a hole punch or even use a small drill. Using a Philips head to punch the hole will probably ruin the screwdriver. Other then that: great idea.
- Anonymous said...This is a great idea! Family has been thinking about building a greenhouse - wow! this will be so much more economical. Especially since I have a sun room. I use the "wicking" system for my outdoor plants in the opposite way. No plant wants to have soggy roots all the time, so after a big rain I lay a piece of string/rope in the saucers leaving the other end on the ground so it will drain my saucers.
- Mary G said...For plants intended to go outside into the garden, I would recommend ONLY using cotton string or other biodegradable things for the wicks. You don't want to end up with a bunch of nylon/polyester strings in your soil. Yuck! LOL I also love the idea of using the tops of other bottles to create a mini-greenhouse for increasing the humidity. Ya'll are a bunch of geniuses! =)
- Anonymous said...Agree re using an awl vs a screwdriver. The screwdriver may look fine (although I would be livid if someone used mine like that!!), but the top of it is not designed to be impacted that way, and may chip off. Better to use a hot nail, a cold nail with a hammer (an surface protection if you're working on a marrable surface (or concrete which is also dangerous to work on with impact tools and no safety gear), or an awl.
- Anonymous said...Instead of lifting the top off every time you want to water, try cutting a small (maybe 1 inch) hole in the side of the water container, not large enough to compromise the stability of the bottle, but large enough to fit the spout of your watering can in. Might also help the bottle breath and discourage mold build-up.
- Backyard Farming in Michigan said...A drill works much better for the caps. Also, you can cut the bottom out of a somewhat smaller bottle and place it inside the top of the planter until the plants reach a couple of inches. It sort of acts as a mini greenhouse by keeping the humidity high which is critical for very young seedlings.
- Anonymous said...Just found this site today on fb, GREAT idea to start seedlings! Another use I have found for 2L pop bottles is to "plant" them upside down in the garden right beside the tomato plants...minus the bottle caps and with the bottom cut out, leaving some of the bottle up out of the ground. Filling the bottle with water allows the water to get to the root zone of the transplant; I tried some with and some without-huge difference in growth and health of the plants. This way there's no danger of soil fungus splashing up onto the leaves and eventually ruining the crop.
Please continue to add to the discussion!!
Well actually you can also try to use a small piece of cloth (except silk) to use as a water absorber for the self-water pot. I’m not good with science myself. The only good explanation I know is that cloth or yarn or threads are good example of liquid absorbent.. that’s why it’s a good material to use for self water pot like yours.
I was wondering, I have a bunch of sprigs I’m trying to root from a bamboo plant . Could I do this with them and transfer once they have roots??? Thanks for Idea!
This is such a great way to start seeds! I’ve been using this method plus peat pellets – for some of my more "finicky " seedlings that don’t like their roots disturbed when transplanting into the garden.This gives me a great idea for repurposing the parts of styrofoam egg cartons the eggs sit in…If I poke a small hole with a nail and thread through a cotton piece of yarn,then tie a knot on the inside( large enough to not go back through hole)..This will be my watering wick…Then place the egg carton,filled with/ soil and planted,into a shallow cookie sheet with edges.I think I’ll have to give about 1/2 " of water a day ,for a sunny placement,poured into the pan after the initial watering.Word of advice- overwatering will rot roots and kill plants! I wait until they are obviously needing a drink,you can look and tell!
THIS IS THE BEST IDEA-AND THE BEST WAY TO START SEEDLINGS THAT IVE FOUND YET!!
TO ANSWER SOME QUESTIONS: Some morning and/or afternoon sun would be best, COVERED OR UNCOVERED-just watch your water level if left uncovered. A grow light for half the day would also work fine, if not somewhat better because its controlled. I prefer to cover the soil with another half of 2 liter w/ the cap off like some suggest, to make it like a mini-greenhouse. Plastic wrap w/ “air holes” poked through also works wonders; or you can try an unused or thoroughly cleaned highlighting cap (the kind that you hook and pull your hair through when highlighting) to cover the top and give the greenhouse effect, until the seedlings have sprouted tall enough to reach the top. ANY SIZE OR TYPE drink bottles w/ caps would work for this AWESOME idea…just as long as you can cut the bottle in half and invert the top half into the bottom half. Its more a matter of preference on how small or large of an “area” that you want to start your plants or how many seedlings you want per container. Cotton Knitting Yarn or the white cotton utility string works best for this project because of the thickness but ANY COTTON string will work. Ive tried TONS of ways to start plants inside, as I can NEVER WAIT for spring to get my hands in the earth, and this BRILLIANT IDEA actually worked THE BEST! It even works better than the mini-greenhouse kits you can buy (that contain the peat pellets) and its A WHOLE LOT CHEAPER!! My name is Laura and Im a “trial and error” experienced gardner (lol!) with two green thumbs; so feel free to e-mail me If anyone has any other questions or needs advice. Laural1872@gmail.com
Will definately try this in the Spring this year. Just a suggestion but everyone is making hard work making holes in the bottle cap. I use this method to make holes in my pots when there arent any. Try heating a metal skewer or even the end of an old screwdriver or anything else you have to hand, over a gas flame for a few seconds, then immediately insert into the cap. The heat melts the plastic instantly, no forcing the hole necessary.
Leave a comment